
-
Säkerhetskopiera MySQL-databas med hjälp av Backup Wizard i cPanel
Du kan enkelt säkerhetskopiera din MySQL-databas via cPanel genom att följa dessa steg:
- Logga in på ditt cPanel-konto.
- Gå till fliken FILER och klicka på Backup Wizard.
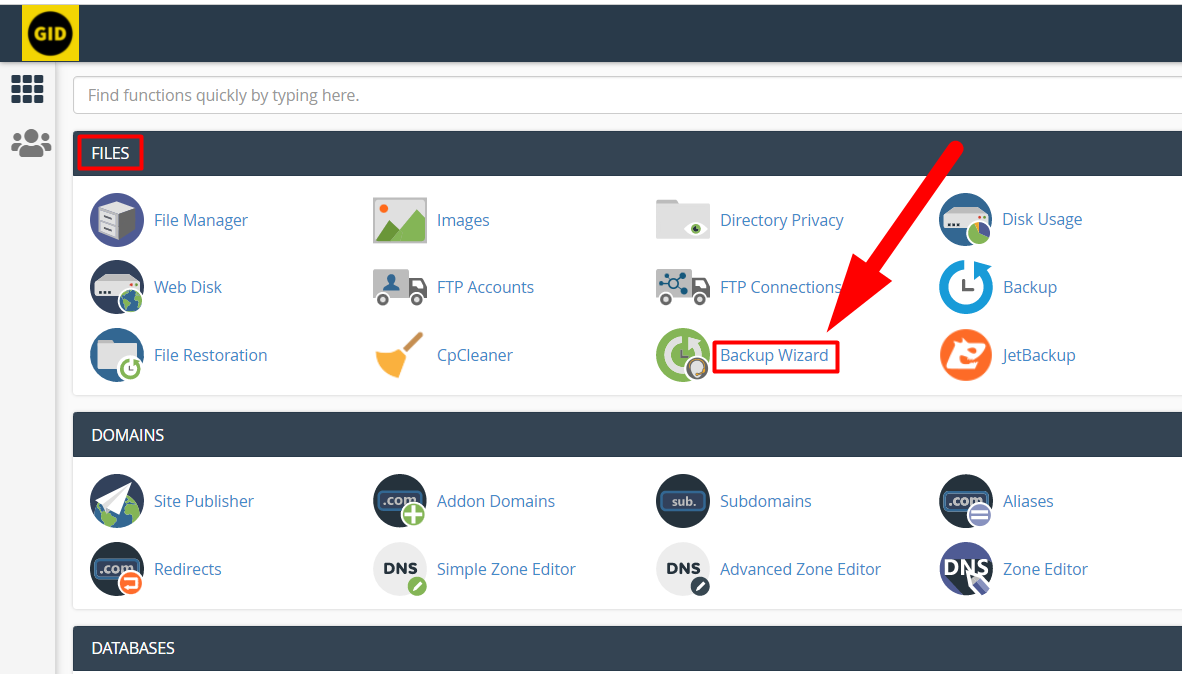
- Välj alternativet Backup Wizard eftersom du vill skapa en säkerhetskopia.
-
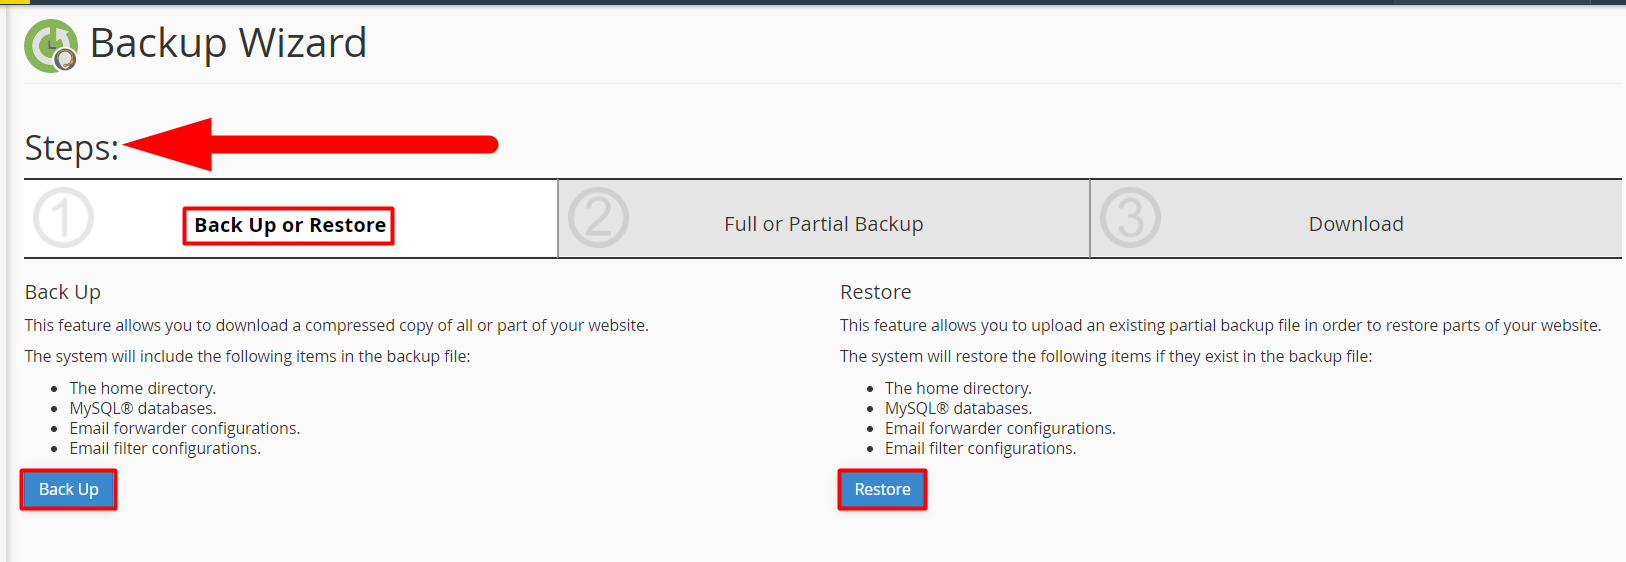
Backup Wizard - Säkerhetskopiera eller Återställ
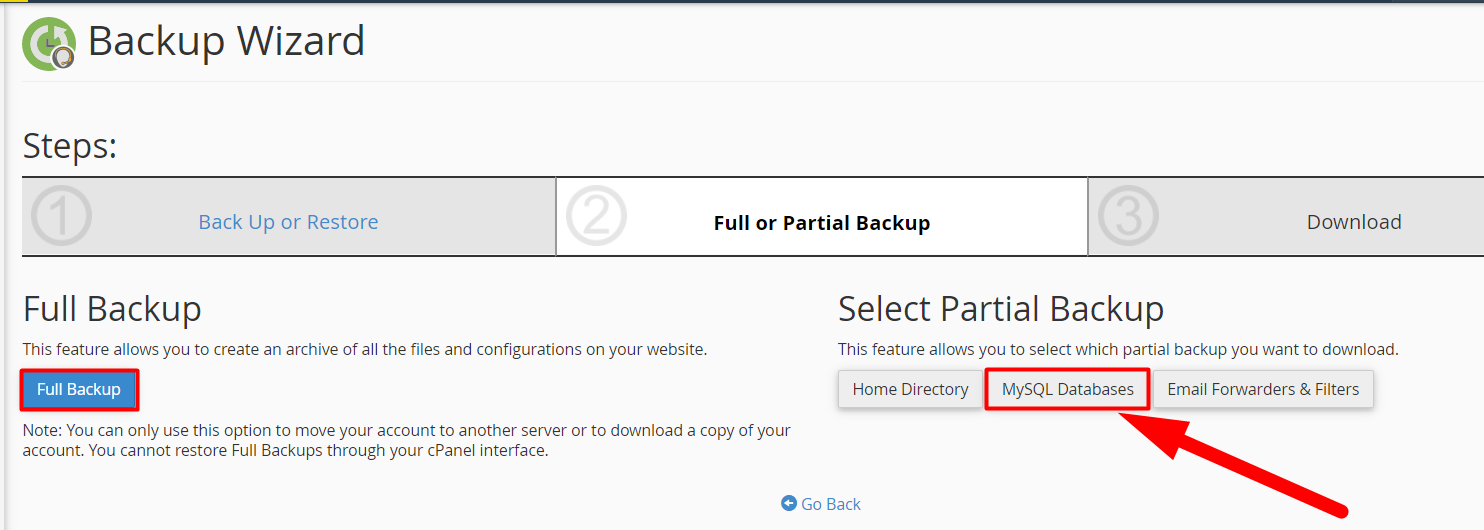
I nästa steg ombeds du att välja typen av säkerhetskopia. Klicka på MySQL Databases för att skapa en separat säkerhetskopia av dina MySQL-filer.
-
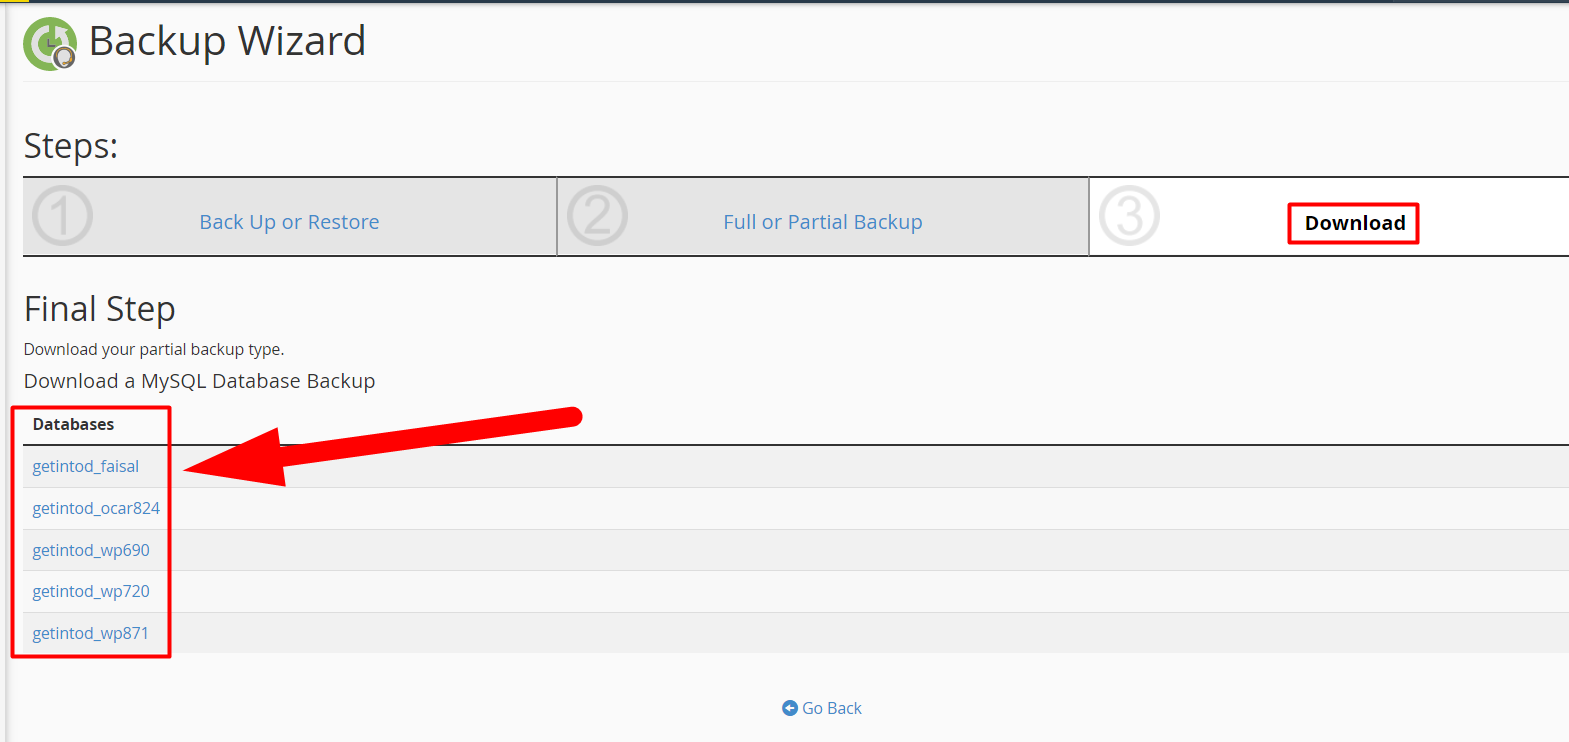
MySQL-databasens säkerhetskopia
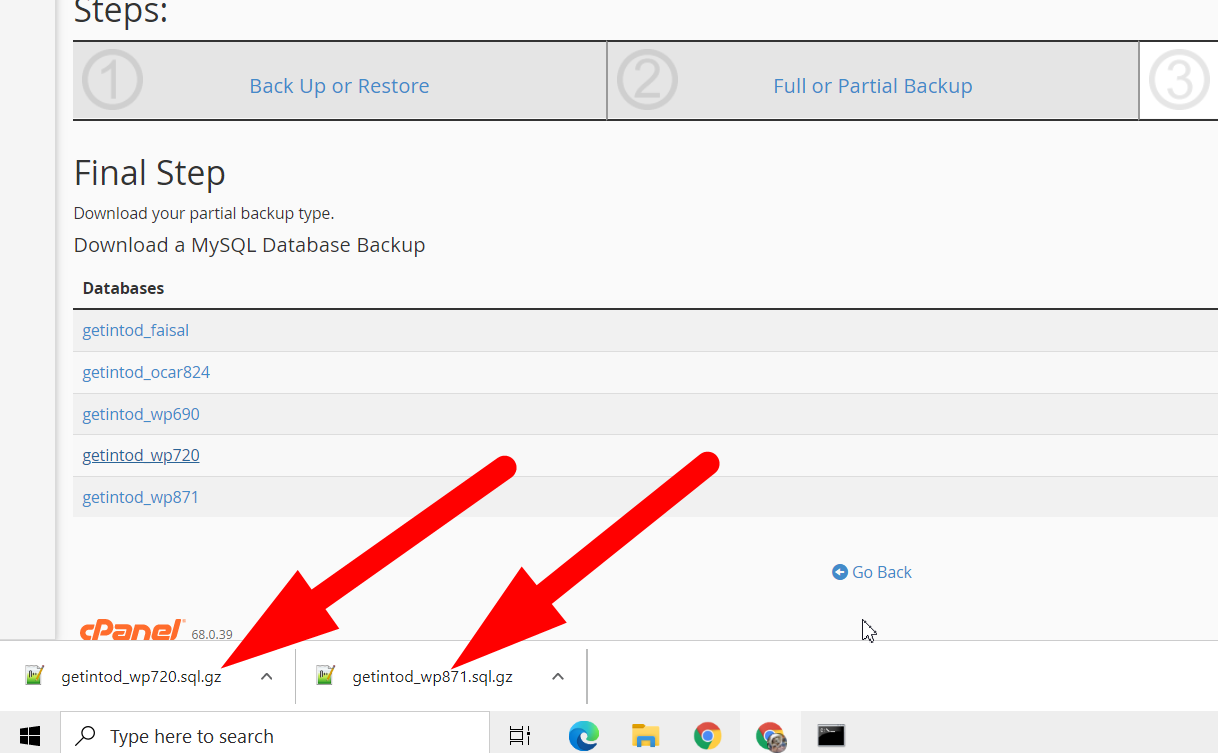
I det sista steget visas en lista över MySQL-databaser som finns i ditt cPanel. Klicka på den databas du vill ladda ner så påbörjas nedladdningen automatiskt.
-
Ladda ner MySQL-databasen
Det kan ta lite tid att ladda ner databasen (beroende på din internetuppkoppling och databasens storlek).
Grattis!
Du har nu framgångsrikt laddat ner en partiell säkerhetskopia av dina önskade MySQL-databaser.
-
Återställ MySQL-databas med hjälp av Backup Wizard i cPanel
Det är enkelt att återställa en MySQL-säkerhetskopia med hjälp av Backup Wizard i cPanel. Följ stegen nedan:
- Logga in på ditt cPanel-konto.
- Navigera till avsnittet Backup Wizard.
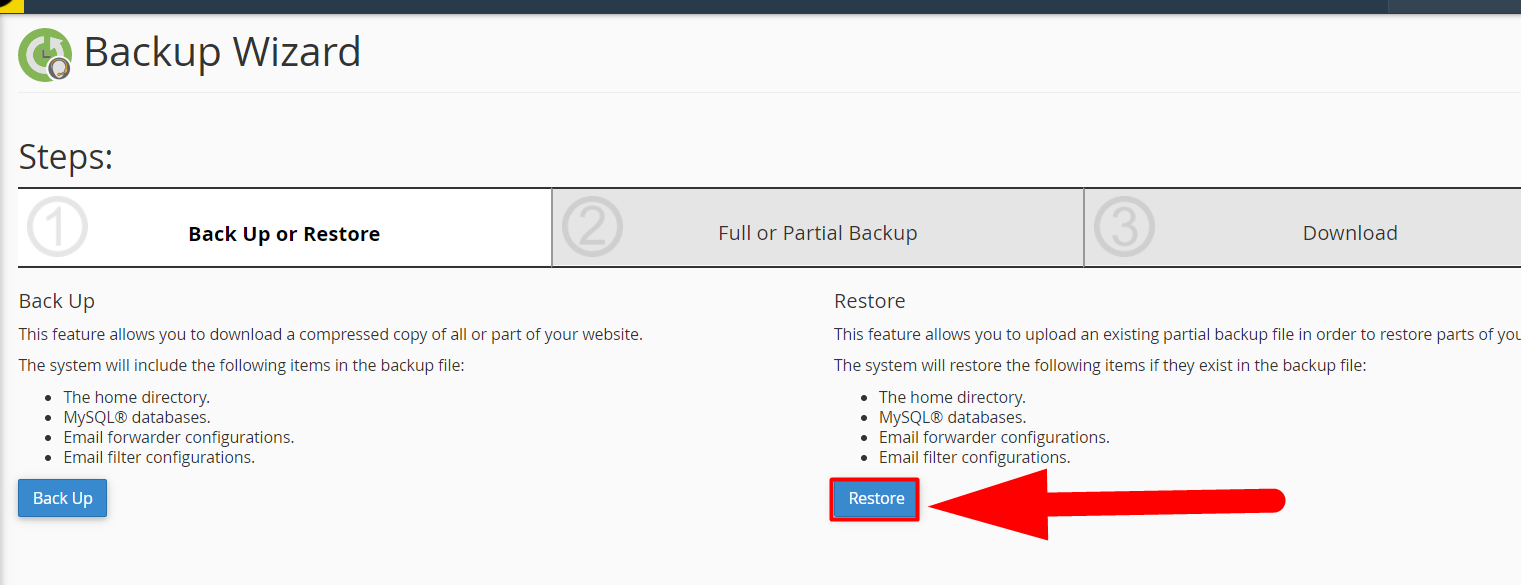
Den här gången klickar du på alternativet Restore istället för Back Up, eftersom du vill återställa din MySQL-säkerhetskopia.
-
Återställ MySQL-databaser
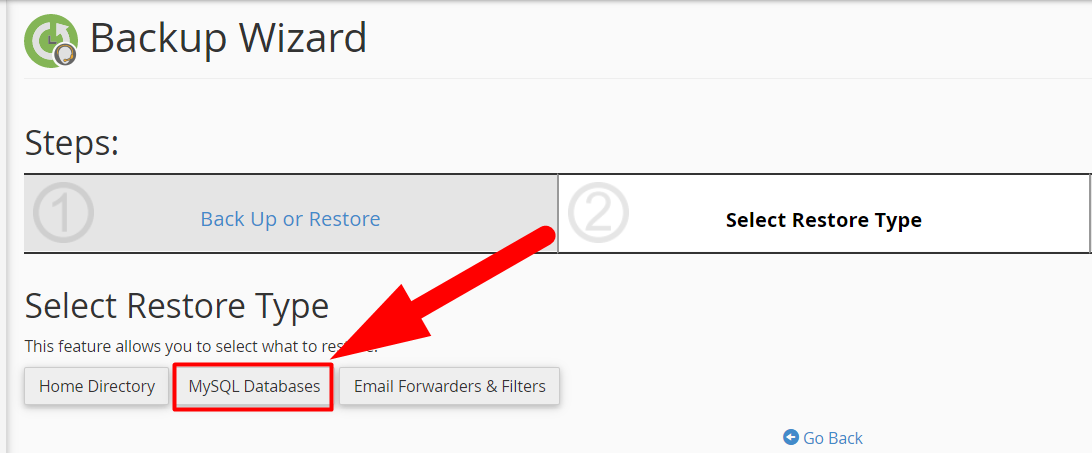
Du ombeds att välja typen av återställning. Det finns tre alternativ:
- Home Directory
- MySQL Databases
- Emails & Filters
Välj MySQL Databases för att återställa databaser. Om du vill återställa säkerhetskopian av din hemkatalog, välj alternativet Home Directory.
-
Välj återställningstyp
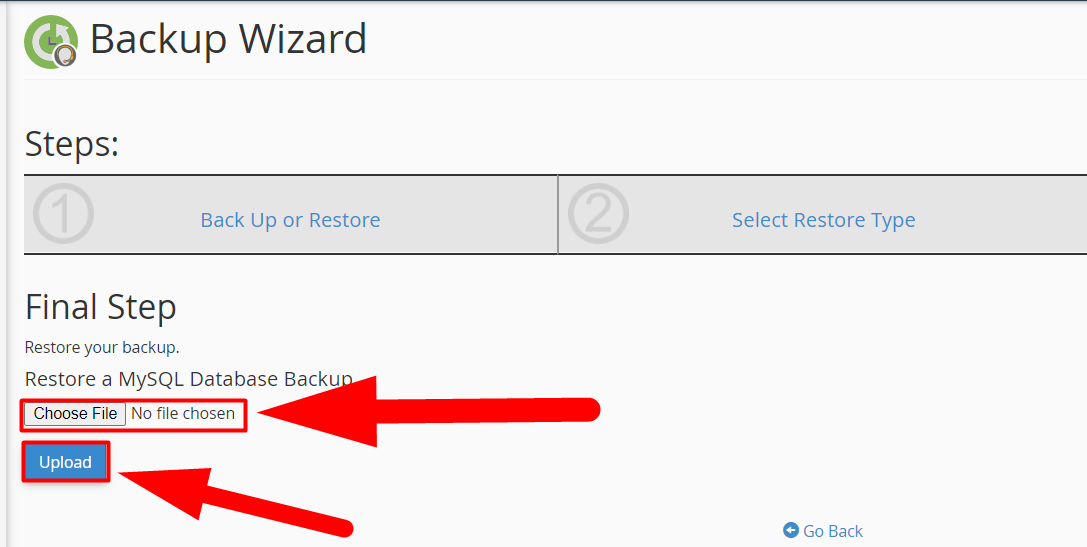
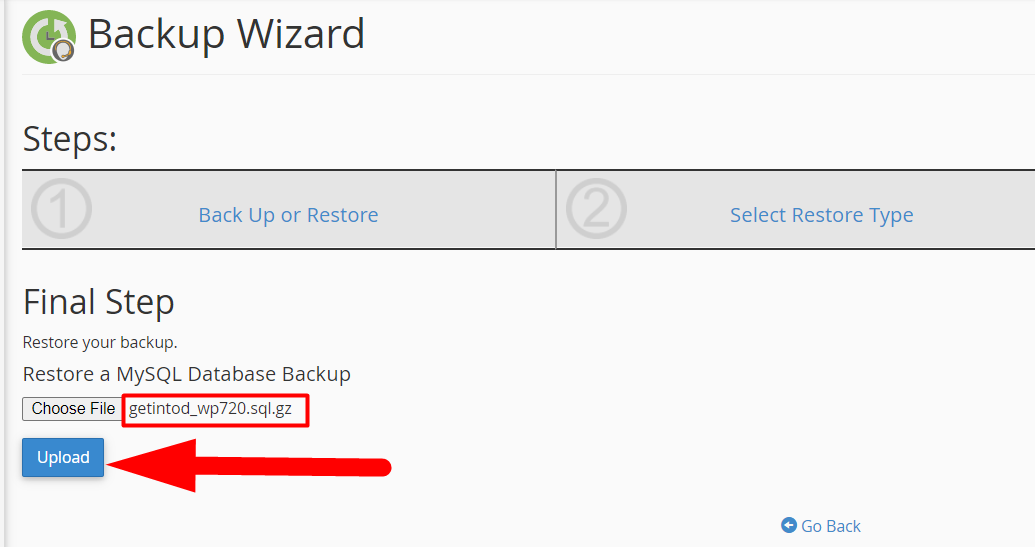
I sista steget, bläddra fram till MySQL-databasen genom att klicka på knappen Välj fil och tryck på Ladda upp för att återställa databasen.
-
Återställ en MySQL-databassäkerhetskopia
När databasen är vald, klicka på Ladda upp-knappen.
-
När du klickar på Ladda upp visas meddelandet:
"Determined database name from sql
Restoring database “[databasnamn]”
Done!"Grattis!
Du har nu framgångsrikt återställt MySQL-databasen.
Lägg till användare till databasen i cPanel
Efter att du har skapat och återställt säkerhetskopian måste du lägga till en användare i databasen och tilldela rättigheter. Annars kan din webbplats visa ett MySQL-fel.
- Logga in på cPanel.
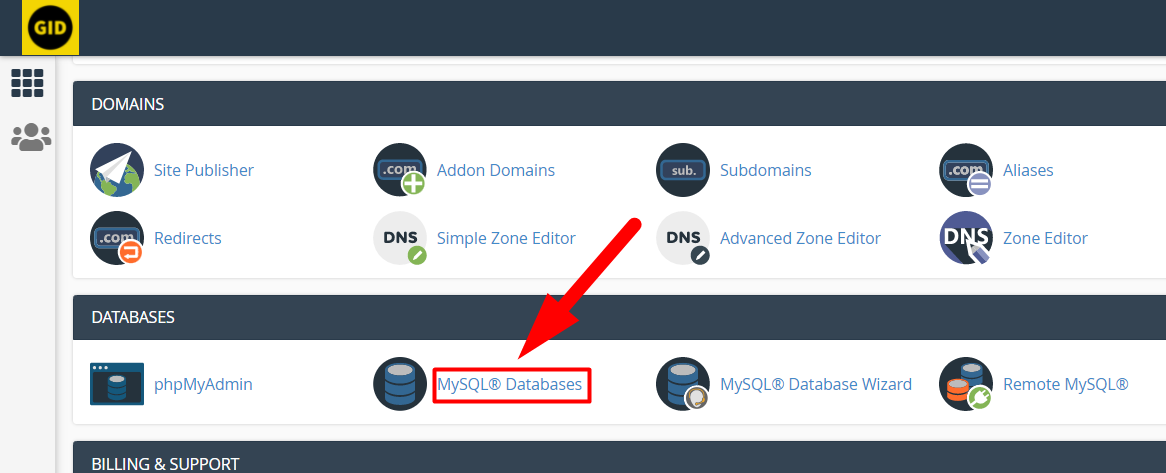
- Navigera till sektionen MySQL Databases under fliken DATABASES.
-
MySQL-databaser
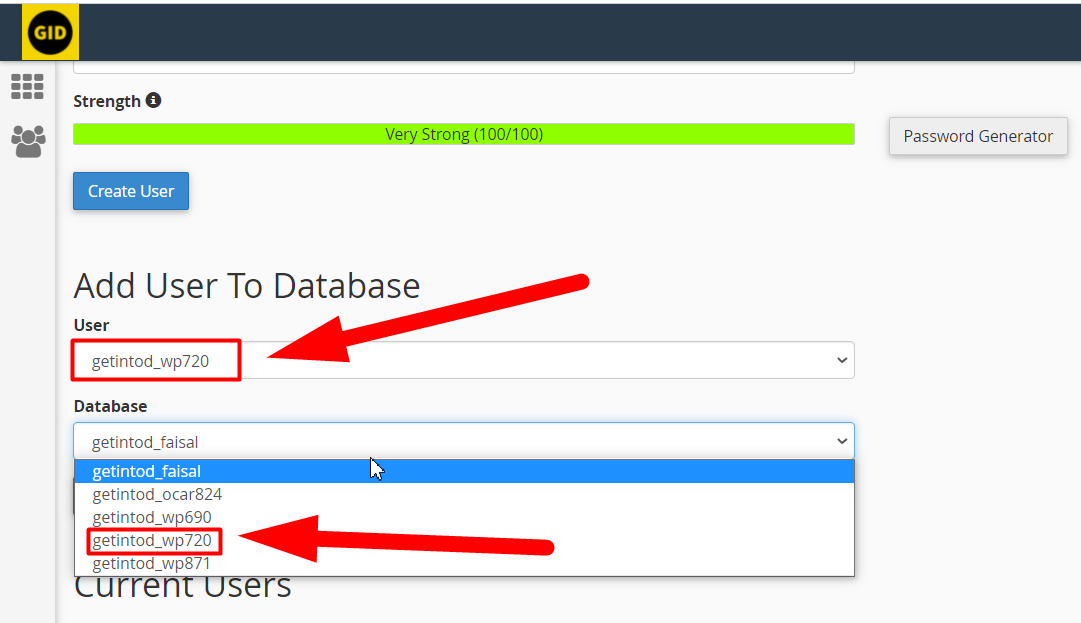
Bläddra ner till avsnittet Add User to Database, välj användaren och databasen och klicka på Add för att gå vidare.
-
Lägg till användare i MySQL-databas
Tilldela All Privileges till databasen och klicka på Make Changes.
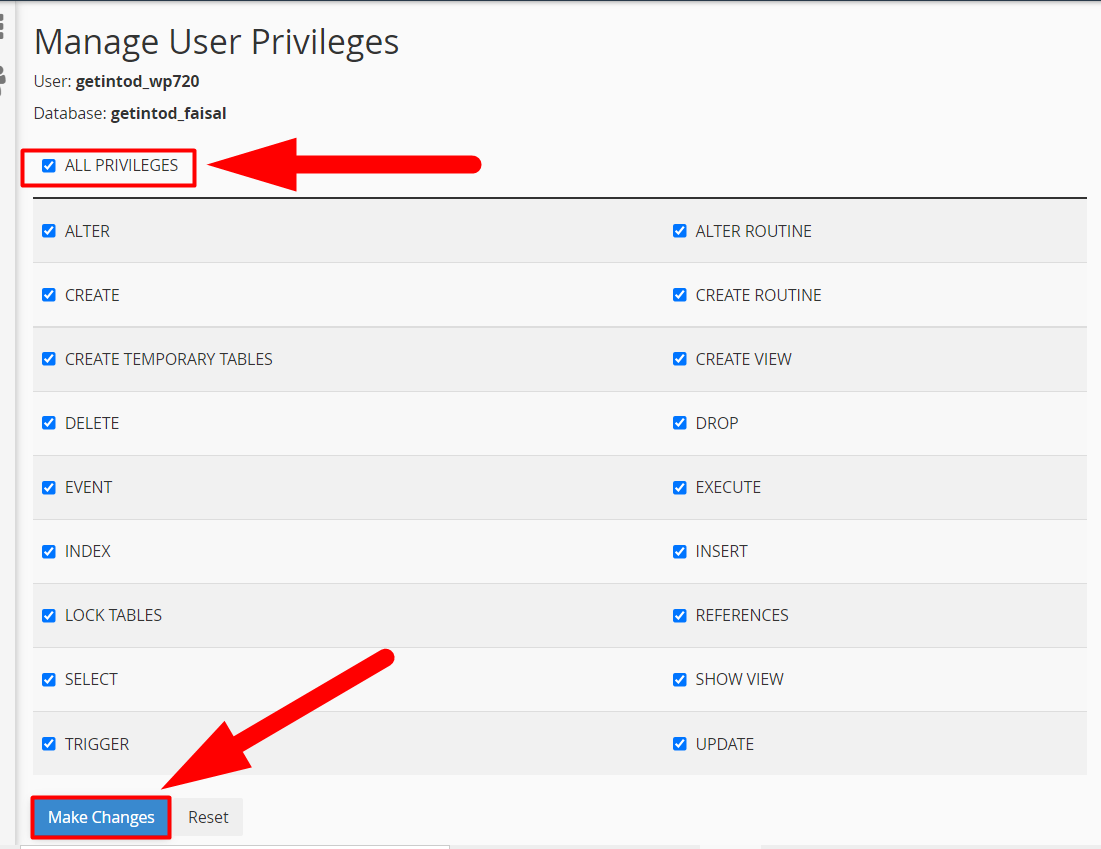
Tilldela MySQL-rättigheter -
Du får ett popup-meddelande om att användaren framgångsrikt har lagts till med alla rättigheter.

Grattis!
Du har nu framgångsrikt lagt till en användare i databasen och tilldelat rättigheter.
